Todd's Blog

Todd's Tips for System Adminstrators

  • TechDays
  • Speaking Engagements
  • Contact Me
  • About Me

Connect

  • LinkedIn

Powered by Genesis

Setting up Quickbooks as an Application in Azure AD

posted on May 15, 2015

Adding applications to your Active Directory implementation in Azure AD is fairly straight forward. Let me walk you through a setup and show you what you’ll need to do.

First you need sign up for Windows Azure. This part is free, just go to your free azure trial.  Note that having an Active Directory in Azure does not cost anything. You can add a limited number of applications under the free version as well but can’t use two-factor authentication.

Next you need to create a directory. The Microsoft MVA I recorded with Anthony Bartolo covers this off way better then I can do here. So go on and watch it, follow along and once you are familiar with that, come on back.

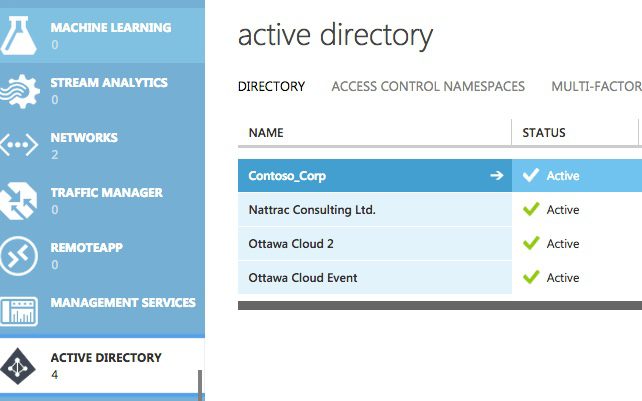
You should now have an Active Directory in Azure. Here is a screenshot of my directories.

Azure-Active-Directory-Screen-1

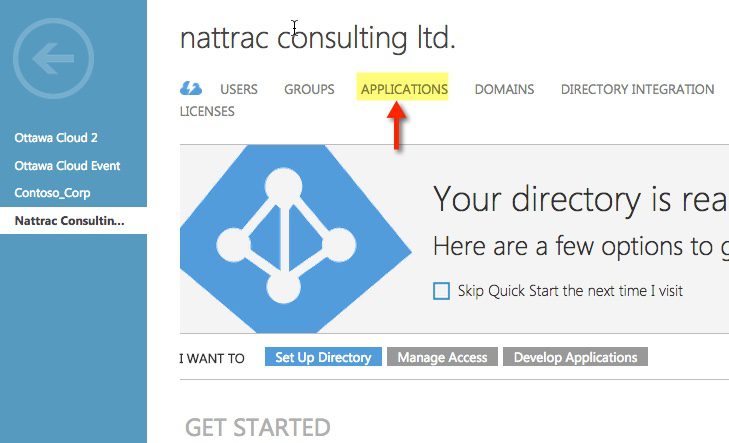
Once your users are created and working properly, head over to the applications.

Azure-Active-Directory-Screen-2

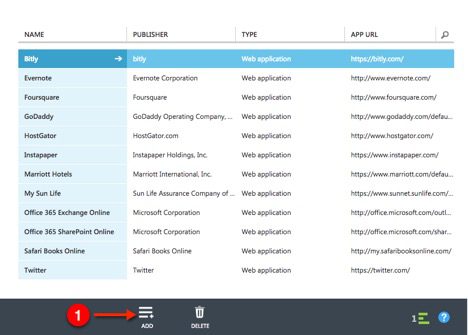
In the applications area, click add in the lower bar on the screen.

Azure-Active-Directory-Screen-3


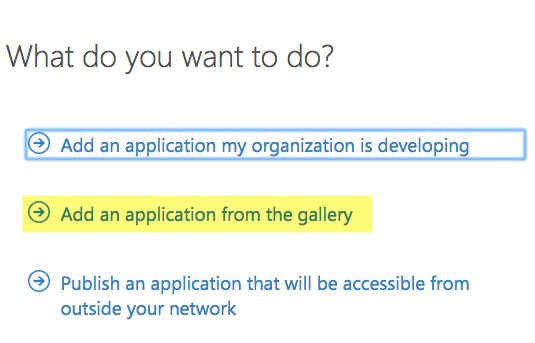
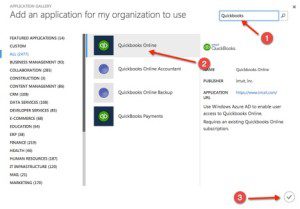
Click on Add an application from the gallery

Azure-Active-Directory-Screen-6

Next search for the application you want. In my case I entered in Quickbooks and searched for it. Find the app, click on it and click the check mark.

Azure-Active-Directory-Screen-7

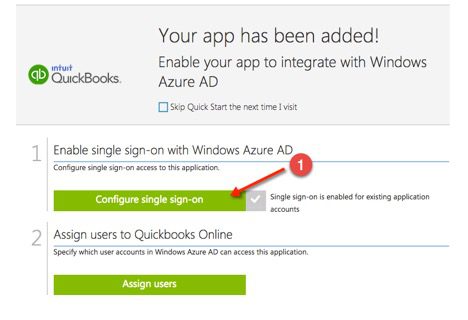
Now that you’ve added the application, you need to assign it to the user. The wizard will bring you to this screen. First click on Configure single-sign on.

Azure-Active-Directory-Screen-8

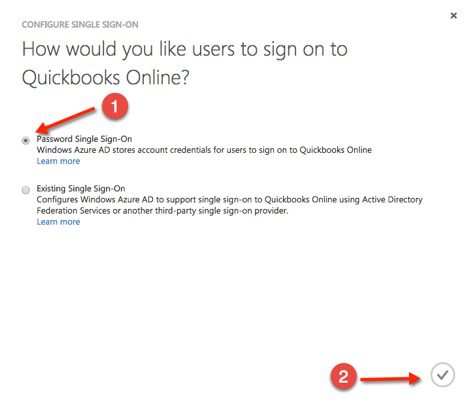
Here you are going to select Password Single Sign-On then click the check mark.

Azure-Active-Directory-Screen-9

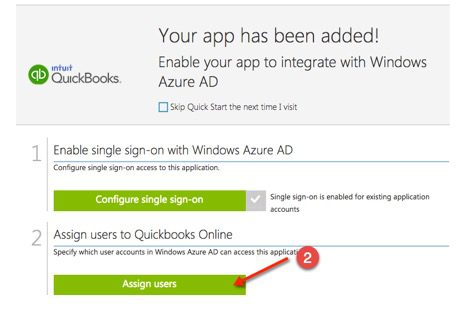
Next you will go back to the Your app has been added! screen. Click Assign users

Azure-Active-Directory-Screen-10

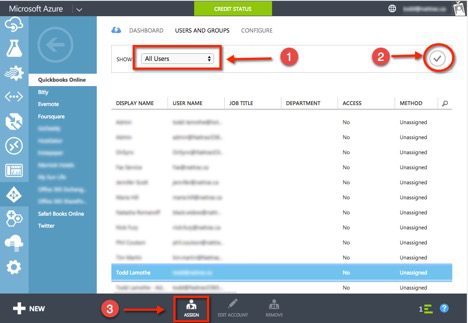
Change the sort to users (or if you want to assign to a group, leave it as is). Find the group or user you want, select it and then click ASSIGN.

Azure-Active-Directory-Screen-11

You will get a warning screen. You have the option of putting in credentials in for the user (great if you don’t want the user to know the underlying password for the application) or the user will be prompted for them first time if you do not.

Next direct the user to myapps.microsoft.com and have the user log in. If you have two-factor authentication on then you will be challenged for the second piece of authentication. Two-factor authentication is available on Azure AD, but it has a cost for each user who needs it. Having two-factor authentication is a great way to lock down your system though.

Once the user logs in you will screen like the following.

Azure-Active-Directory-Screen-12

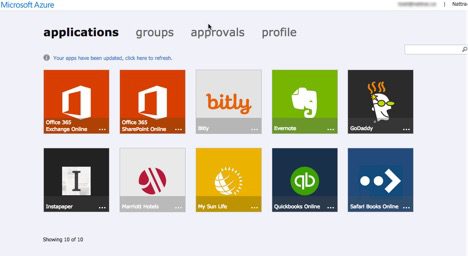
Click on the application, in this case Quickbooks and then you will be prompted for Quickbooks credentials if the admin didn’t enter them in and you have not done so yet.Azure-Active-Directory-Screen-13

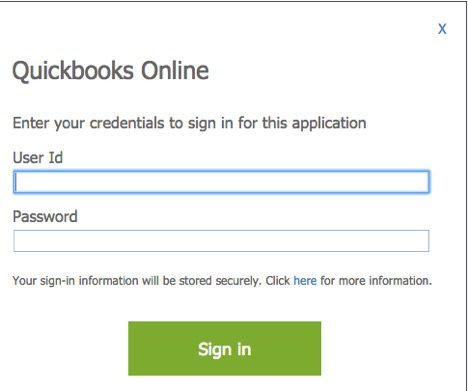
Once you do this, you’ll be good to go.


Filed Under: Technology Tagged With: AzureAD, QBO

Clearing the Windows Update Cache

posted on April 22, 2015

I’ve been seeing issues with Windows updates where computers are getting errors checking in with WSUS. Out of 250 computers I have half a dozen that have update errors. The fix for these is to clear the Windows update cache.

Clearing the cache is straight forward.

  1. Open a command prompt as administrator
  2. run “net stop wuauserv”
  3. go to the windows folder and delete the SoftwareDistribution folder.
  4. run net start wuauserv

There is a Microsoft fixit you can use as well. Check out this link http://support.microsoft.com/Default.aspx?kbid=971058 for more information.

Filed Under: Technology Tagged With: Update, WSUS

Setting up a Delayed Charge in Quickbooks Online

posted on April 15, 2015

I moved to Quickbooks Online from Quickbooks Pro. In Quickbooks Pro I had the option to mark an invoice as a draft. It let me keep track of hours I was billing to a customer without actually creating a receivable that would show up on aging reports, etc. That feature, sadly is missing from Quickbooks Online (maybe I am the only person who used it, don’t know). My bookkeeper, who is awesome, suggested another option, use a delayed charge.

Creating a delayed charge is pretty straight forward. From the  customer portal, click on the plus sign (+)at the top of the screen and then select Delayed Charge, as seen in the picture here.

Quickbooks-Delayed-Charge-1

This will bring you into the delayed charge screen.  Enter the required information. In this case I created a consulting charge. Then click Save and close.

delayed-charge-2

You can do this multiple times and add extra lines in a delayed charge.

When you are ready to actually invoice, return to the customer portal, click on Unbilled Activity to filter your delayed charges. Then click Start invoice for the customer you wish to invoice.

Quickbooks-delayed-charges-3

Now you will be brought to the familiar invoice page. You probably know what to do here. Note you may need to tab through the invoice to get the tax to show up correctly. Here’s hoping this is something that can be resolved in a later update.

Quickbooks-delayed-charge-4

That’s all there is to it.


Filed Under: Technology Tagged With: Quickbooks

  • « Previous Page
  • 1
  • …
  • 3
  • 4
  • 5
  • 6
  • 7
  • …
  • 107
  • Next Page »

Recent Posts

  • Office 365 – Creating Custom SKUs
  • Setting a Default Printer in Windows 10
  • Deploying Windows to the Correct Drive in Configuration Manager
  • Surface Pro 4, Surface Dock and DVI Problems
  • Enabling UEV in Windows 10 1607

Recent Comments

  • Moore Details on Setting up a Delayed Charge in Quickbooks Online
  • MCP Exam Training on Using PowerShell to Get a List of Groups from Active Directory
  • Kac on Setting up an Office 2010 KMS Host Server
  • prabumedia.com | Pilih lisensi MAK atau MKS untuk aktifasi produk Microsoft ? on Setting up a KMS Server
  • prabumedia.com | Pilih lisensi MAK atau MKS untuk aktifasi produk Microsoft ? on Setting up an Office 2010 KMS Host Server

Archives

Categories

Meta

  • Log in
  • Entries feed
  • Comments feed
  • WordPress.org